Nothing separates professional painters from beginner painters like the quality of the lines they paint. While novice painters may find it difficult to produce straight lines by ceilings or baseboards, skilled painters are able to replicate perfectly straight lines every time.

Whether you are beginning a painting project or are looking to brush up on your skills, you’re in the right place. Here are eleven tips to help you paint perfect lines.
How to Paint a Straight Line
1. Use an Angled Brush
If you are going to try to paint a straight line with just a brush, be sure that it is an angled brush. Brushes with rounded tips will not be able to create the same straight lines that angled brushes make.
2. Don’t Put Too Much Paint on the Brush
When using just an angled brush, be sure that you don’t overload the brush with paint, as there is no safety net if the paint starts to run.
3. Draw the Lines
Using only a brush to create a straight line without a baseboard, ceiling, or other reference line can end up in disastrous squiggly lines. Instead of just eyeballing it, use a ruler or yardstick to lightly draw out the line with pencil.
Carefully paint along the line with the angled brush. Once you are finished painting and the paint has dried, carefully use an eraser to get rid of any of the visible pencil marks.

4. Use an Edger
Another option you have in your painting toolbelt is an edger. Using an edger is a great way to get cut in when there is a 90 degree angle.
To use an edger, simply load the square pad with paint and run the wheels of the edger along the surface.
5. Keep the Edge Clean
An important thing to watch out for when using an edger is that the wheels don’t get any paint on them. This means that you have to be careful when loading the paint on the edger that you don’t put on too much so there is no dripping.

6. Use a Painter's Shield
If you are spraying paint on a wall, a paint shield is your best friend. While you will still have to cut in before you spray, a shield will keep any overspray from ruining your lines.
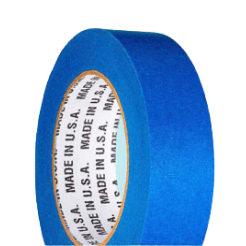
7. Use Painter's Tape
The final tool in your arsenal is painter’s tape. While it does take some setting up, painter’s tape is the most effective way for painters to create straight lines.
Whether cutting in or making an isolated line, painter’s tape can create a straight line on almost any surface.
Although blue tape works best for sensitive indoor walls, you may want to consider using green painter's tape if you plan on painting a rough, uneven surface or painting outdoors. 
8. Let Paint Dry
An important tip for using painter’s tape to create straight lines is to let the paint dry completely before attempting to remove the tape.
If the paint is still wet, the tape will not remove cleanly, potentially tearing off portions of the paint with it.
9. Put Caulk on the Tape
A popular trick to use with painter’s tape is to caulk along the edge of the tape. This keeps any paint from seeping below the paint, especially on uneven surfaces.
Just apply a very thin layer of clear or white (depending on the wall color) caulk, then over it. This is one instance where you want to remove the tape before the paint or the caulk dries.
10. Layer the Tape
If you are using multiple pieces of painters tape to create your lines, be sure to start on one side and work your way down, layering the pieces of tape on top of each other.
Then when it is time to remove the tape, start peeling from the first strip you placed, and the rest should come right off.
11. Double Check Your Work
Perhaps the most important step you can take when painting is double-checking your work. If the line or the edge you were working on didn’t turn out as crisp as you had hoped, try it again!
It may be frustrating to go back and redo work, but touch-ups are the most important part of the painting process. Quality touch-ups are what separate professionals from amateurs.

Use Quality Tools & Supplies
Invest in tools and products that you can trust to get your jobs done. No matter how careful or skillful you are, if your brush has frayed fibers, your tape lets paint seep through, or your edger doesn’t paint evenly, you won’t be able to paint perfectly straight lines.
Here at TapeManBlue, high-performing painters tape is what we do best. If you are looking to get perfectly straight lines on your next painting project, check out our American-made blue painter’s tape.
Our tape is not only trusted to give you the best results for your painting projects, it is also available at a price that will keep your project under budget. With these simple tips and high-quality materials, you’ll be painting straighter lines in no time!

