Ugh! Has your gorgeous marble split, cracked, or chipped? Here are some ways to combat the damage and quickly fix your marble to make it look brand new again.
Why Marble Cracks Happen
Marble damage is a very common problem that might not be caused by your doing at all. This damage can be caused by a series of ways varying from time to improper installment.
Marble is typically laid out with the use of a concrete substrate. Problems such as an insufficient amount of concrete mix under the slabs or an uneven concrete base layout can cause marble damage over time. This error commonly happens on marble corners due to those places being the first and last spots contractors spread out the concrete mix.
Even when the concrete mixture is perfectly laid out, extended periods of time can cause the concrete to break down. This breakdown process speeds up when the marble continuously undergoes high pressure, such as when it is used for flooring. When the concrete deteriorates, the marble will not have proper support, causing breakage.
Daily household wear and tear on these surfaces is another common cause of marble imperfections. Something as small as a knife slipping when chopping on your cutting board can leave a small dent on your marble countertops. Even with all of these frustrating marble damages, repairs might be easier than you think.

How To Repair Your Marble Surface
Small Crack or Dent
Minor cracks or dents that could appear in your marble surface can be fixed in just a few steps. These tiny damages typically occur from daily kitchen usages and rough shoe soles. All you will need for this repair is a buffer and your study hands.
Even though many different buffers could work for this process, finding a marble buffer or polisher will be best for the most accurate results. These can be purchased at your local home supplies store or through multiple online selling platforms.
Before starting your buffering process, make sure your surface is wiped down and free of any food or dirt particles. Your polisher should come with specific instructions on the best way to level out your marble surface. Many instruction manuals recommend moving your buffer brush in a circular motion until your surface is smooth enough to meet your desired results.
After the buffering process is completed, it is recommended to coat your surface with an “after-polish” powder or spray. This will keep your marble shining while providing longer protection from future damages. Look out for this sealant when purchasing a buffer as it can be found in some marble polishing kits themselves. With these quick steps, your marble can shine like new again.
Clean Break
A clean break in your marble surface requires slightly more steps to fix than a tiny nick but can be repaired almost as easily.
Instead of cleaning off a break with water and soap, it is best to use acetone along the sides of the break. Using a nylon brush to apply the acetone will help remove extra marble particles on the breakage, keeping it clean for repair. The acetone will also allow for the repair filling to stick better to the cracked area. It is important to note that acetone has a strong odor that may cause headaches or dizziness when breathed in for an extended period of time. To stop these negative health effects upfront it is best to use a mask, wear gloves and take breaks when working directly with the chemical applied surface.
If the break is considered to be a hairline crack, it is best to use epoxy glue to disguise the fracture in the marble. Simply place a line of glue into the crack and wait for it to dry completely. Once dry, use a buffer or sandpaper to smooth out the glued area. Since most marble has a variegated color, the glue should be able to blend into the hairline break.
For larger breaks, it is best to use a stone adhesive or two-part liquid epoxy to fill in the crack. If enough room is present, push together the two slabs to form the smallest crack possible. If there is an overfill after the pushing process, wipe the extra filling off with a wet rag to save buffering time later. Just like the hairline break, wait for the filling to dry and smooth out the newly fixed surface. Once again the clear, transparent filling should blend in with your marble color to hopefully make it look untouched.
Missing Chunk
Start by obtaining your missing marble piece or purchasing a replacement piece of marble slab. Align this piece to your current marble to see how well it currently fits. If the marble does not line up, acquire marble dust with the same coloring from a local stone supplier. Mix this dust in with equal parts epoxy to create a matching color to fill in your marble accurately. Apply this mixture with a crafting stick or brush to the mismatched pieces and place them together. In the same fashion as a clean break, wipe off the excess mixture to decrease the time needed to smooth out the marble later.
If this slab does not have a supporting platform such as concrete under it, use a wood or strap clamp to hold the piece upwards during the drying process. When using the strap clamp option, wrap it indirectly around the epoxy so it does not affect the drying process. Once dry, buff out the rough mixture to your desired liking and texture.

How to Prevent Marble Damage
Taking care of your marble is highly important when it comes to preventing future damage. When the marble is used daily, such as a kitchen countertop or flooring, it is important to keep it as clean as possible. When wiping down the surface, use soft cotton rags or mops with a mild cleaning solution. Doing this regularly will prevent extra pressure on the marble surfaces.
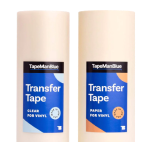
When working on a project by or on your marble surface, use a temporary protection film to keep the area damage-free. Purchasing TapeManBlue’s floor protection film will be your best choice when it comes to protecting against common project floor damages such as foot traffic marks and paint spills. In addition, this specific protective film will remove residue-free for up to 45 days.

With the use of these tips, marble breaks and indentations should be the least of your worries. Following these steps, you will have the skills to prevent and fix up your marble damages with ease.

